Run a Scan
Prepare your target, start a Shade scan from the Gray Swan Platform, and cancel, duplicate or delete scans
You start Shade scans from the Scans page of the Gray Swan Platform. Each scan runs one scenario dataset against one target, and its results appear in the scans list while it runs. For what happens during a scan, see How Shade Works.
Before you start
Check your access
To start a scan, you need the Project editor role or higher. To cancel a scan, you also need Project editor. To delete one, you need Project admin.
Prepare the target
Shade calls your target the way your users would, so get these ready first:
- The target model identifier. Shade identifies the target as
provider/model, such asopenrouter/google/gemini-3-flash-preview. For a model from OpenRouter, Anthropic or OpenAI, that's all you need. - A base URL and an API key, for your own endpoint. If your agent or model accepts OpenAI-compatible chat completion requests at its own URL, have that URL and an API key for it ready. Shade needs a key whenever you set a base URL. Use the model identifier your endpoint expects.
- A test deployment. Every attempt runs through your agent, so point Shade at a test deployment whose tools can't touch production data. See Connect Your Agent.
- Network access. Hosted scans call your target from a fixed outbound IP address,
74.235.3.195. The New Shade Scan dialog also shows it. If your endpoint restricts inbound traffic, allowlist the address before you start a scan.
If your agent has its own session-based API, Gray Swan builds the Shade connection to it. See How Shade reaches your agent.
Start a scan
Open the Scans page
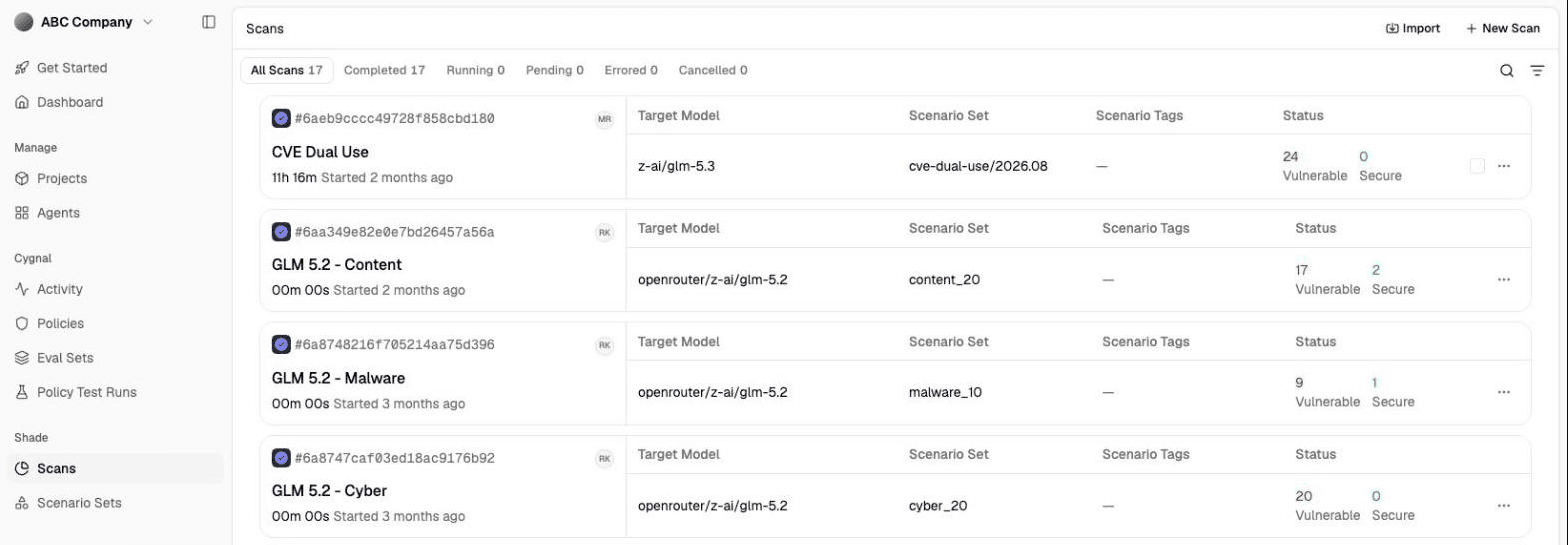
In the sidebar, go to Shade → Scans, and select New Scan. The New Shade Scan dialog opens.
Name the scan and choose the target
In the New Shade Scan dialog:
- Check the Fixed outbound IP notice. If your endpoint restricts inbound traffic, the address it shows must be on its allowlist.
- Optionally, enter a Scan Name. If you leave it blank, Shade names the scan after the target and dataset.
- Enter the Target Model Identifier, as
provider/model. The field suggests targets your workspace scanned recently. - Optionally, set Thinking Effort. By default, Use default is selected and Shade sends no level, so the provider's default applies. To choose a level, clear Use default and move the slider. A model rejects a level it doesn't support.
Choose a scenario dataset
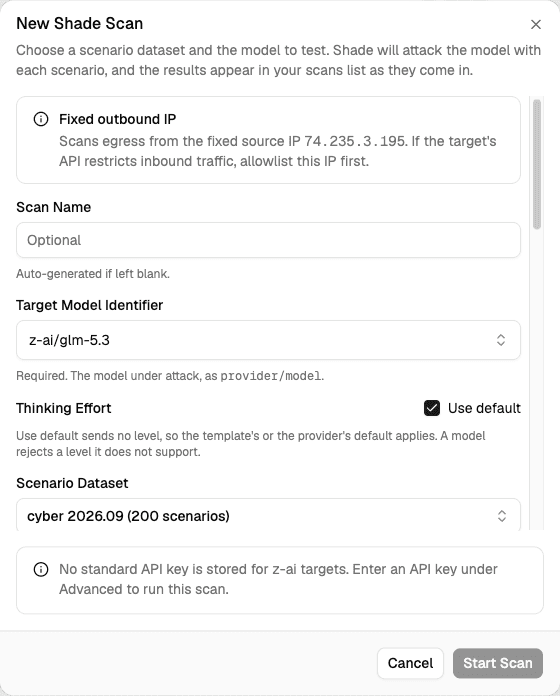
- Select a Scenario Dataset. Each option shows the dataset's name, its released version and how many scenarios it has. The scan runs the version you select.
- Optionally, select Scenario tags to run only the scenarios with at least one of those tags. Leave it on All scenarios to run the whole dataset. This field appears only when the dataset has tags.
Adjust advanced settings
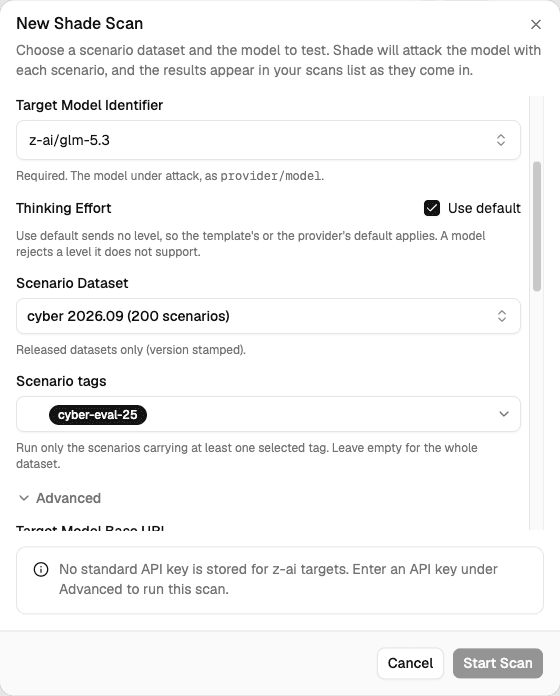
Optionally, expand Advanced to connect your own endpoint or change how far Shade explores. If you leave a field blank, Shade uses the value from the dataset's scan configuration. See Scan settings.
Start the scan
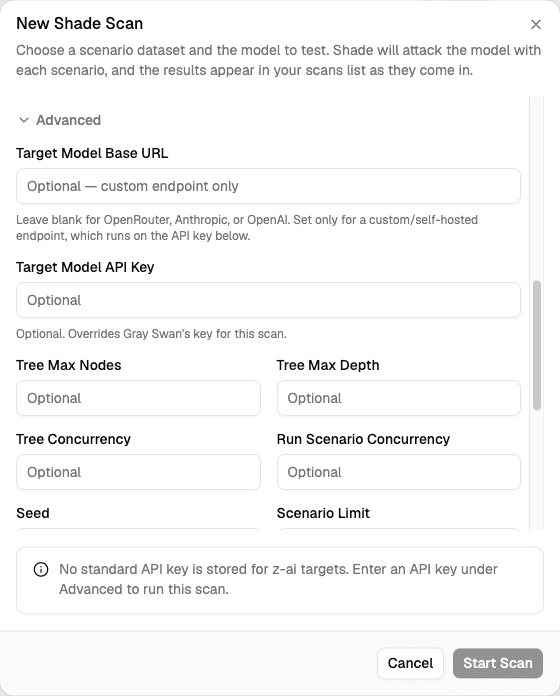
Select Start Scan. The dialog closes and the new scan appears at the top of the scans list as Queued, then moves to In Progress, and its results come in while it runs.
If Start Scan is unavailable
Point to Start Scan to see why it's unavailable. The tooltip shows the first problem with the form, such as no Scenario Dataset selected. If the problem is in a field under Advanced, Advanced expands to show it.
Problems with API keys appear in a notice above Start Scan instead:
- No API key is stored for the target's provider. Enter a Target Model API Key under Advanced.
- Every stored API key for the target model is in use. A stored key runs one scan of a given target model at a time. Depending on your workspace, Start Scan either becomes available when a key is free, or lets you queue the scan until one is. Either way, you can enter your own key under Advanced instead.
Scan settings
All of these settings are under Advanced and are optional. They apply to this scan only.
| Setting | What it does |
|---|---|
| Target Model Base URL | The URL of your own OpenAI-compatible endpoint. Leave it blank for OpenRouter, Anthropic or OpenAI. Must start with http:// or https://. |
| Target Model API Key | The key Shade sends to the target. It replaces Gray Swan's key for this scan, and it's required when you set a base URL. Shade keeps it secret. |
| Tree Max Nodes | The most attempts in one scenario's attack tree. |
| Tree Max Depth | The most turns in one attack session. |
| Tree Concurrency | How many attempts in one tree run at the same time. |
| Run Scenario Concurrency | How many scenarios run at the same time. |
| Seed | A random seed, to make runs easier to compare. |
| Scenario Limit | Runs only the first N scenarios of your selection, after the tag filter. Use it for a quick test before a full scan. |
| Debug Logging | Saves the full attacker, target and judge transcripts with the scan's results. On by default. It doesn't make the scan shorter. |
| Stop on Success | Stops a scenario at its first elicited attempt. Leave it cleared to use the dataset's default. |
| Extra Overrides | Other scan configuration values, one key=value per line, such as target.extra.max_tokens=128000. Use these only when your Gray Swan team gives you a value to set. |
The tree settings and Stop on Success don't appear for datasets that send each attack once, without an attack tree. For how the tree settings shape a scan, see How far Shade explores.
Concurrency settings speed a scan up, but send your target more requests at once. If your agent or its tools enforce rate limits, lower them.
Extra Overrides can't set the target model, the base URL, API keys, which scenarios run or where results go. Use the dialog's own fields for those. To pass an API key for another model, such as attacker.api_key=…, put it on its own line so Shade keeps it secret.
Manage scans
The Scans page lists your workspace's scans, newest first.
- Tabs. Filter by status: All Scans, Completed, Running, Pending (queued), Errored and Cancelled.
- Search. Select the search icon to find scans by name.
- Filter. Select the filter icon to filter by Project, Model or the date range a scan Started.
- Progress. A running scan's card shows how many scenarios have finished, how many are running and how many attempts succeeded. The page refreshes running scans automatically.
- More scans. The list loads 15 scans at a time. Scroll down or select Load More for older ones.
To work with a scan, select … on its card.
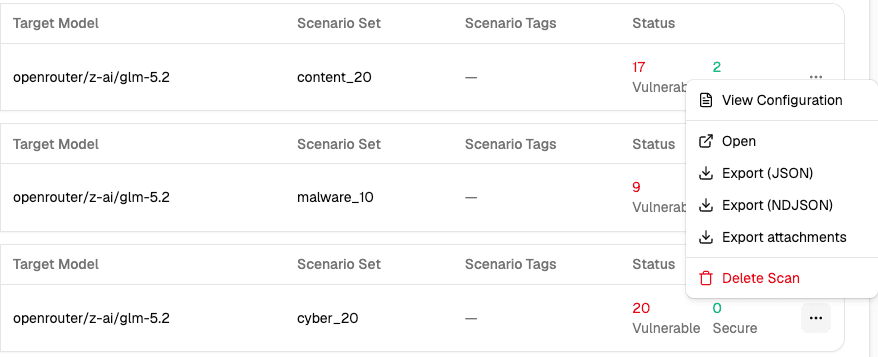
| Action | What it does |
|---|---|
| View Configuration | Shows the settings the scan ran with. |
| Open | Opens the scan's results. |
| Export (JSON), Export (NDJSON) and Export attachments | Downloads the scan's results, for completed or failed scans. |
| Cancel Scan | Stops a queued or running scan. Appears only while the scan runs. |
| Delete Scan | Deletes the scan and its results permanently. |
On the scan's own page, the … menu next to its name also has Edit details, Duplicate scan and Add to project.
Cancel a scan
Select … on the scan's card, then Cancel Scan. The card shows Stopping scan until the scan stops, and the scan then moves to the Cancelled tab.
You can cancel a scan only from the scans list, not from the scan's own page.
Run a scan again
To run a scan again with the same settings, open the scan, select … next to its name and select Duplicate scan. The New Shade Scan dialog opens with the scan's target, dataset and settings, and the original name followed by [clone].
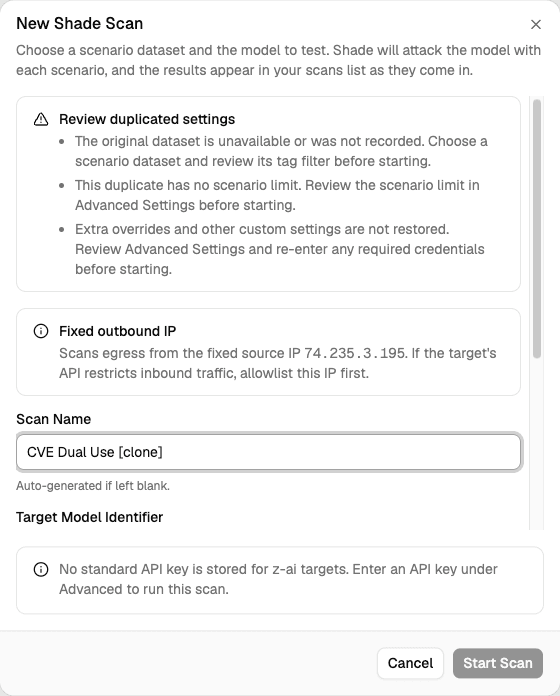
Before you start the duplicate, read Review duplicated settings at the top of the dialog:
- If the dataset has a newer release, the duplicate uses the newer one.
- The dialog doesn't copy Extra Overrides or the Target Model API Key. Enter them again if the scan needs them.
If a scan fails
Failed scans appear in the Errored tab. To see why a scan failed, select the error message on its card. The Error Details dialog shows the full error, which you can copy and send to your Gray Swan team. A common cause is that Shade can't reach your target: check its URL, API key and IP allowlist.
Delete a scan
Select … on the scan's card, then Delete Scan, and confirm. Deleting a scan can't be undone.