Members, Roles and Access
Invite and manage workspace members, assign roles and control project access
Overview
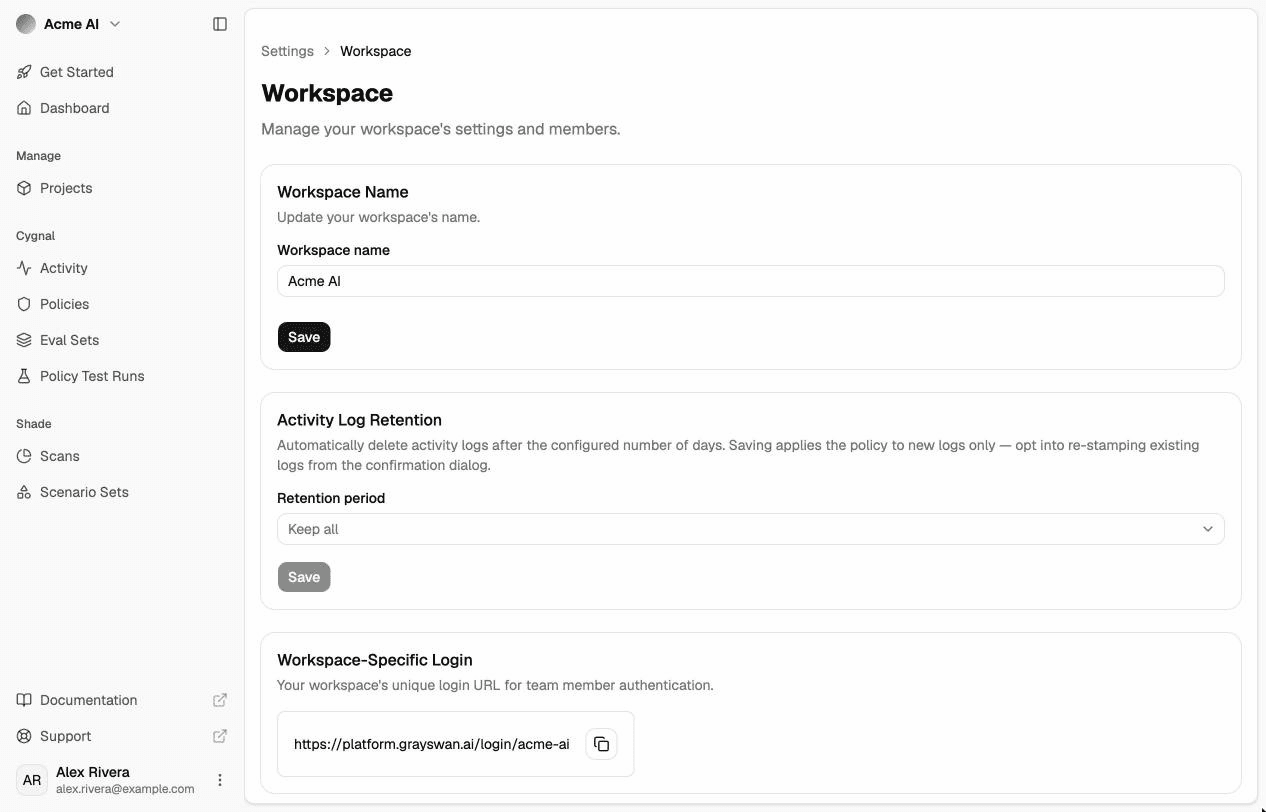
Workspace administration happens on the Workspace settings page. To open it, do either of the following:
- Go to Settings and select Manage on the Workspace card.
- Open the workspace switcher and select Invite & Manage Members.
Every member can open this page and see the member list. Only admins can invite members and manage invites, roles and members.
Role-based access control
Workspaces use role-based access control (RBAC), which separates two kinds of role:
- Workspace roles control what someone can do across the workspace.
- Project roles control what someone can do inside a specific project.
Roles
Workspace roles
| Role | Description |
|---|---|
| Workspace Admin | Full access to the workspace and to every project. Can manage members, roles, project access and workspace settings. |
| Workspace Member | Workspace-wide access to policies, activity, scenarios, usage and their own API keys. Can create projects. Has no access to existing projects until they're given a project role or create a project of their own. |
Project roles
Project roles apply only to the projects a member is given access to. Workspace Admins already have full access to every project, so they don't need project roles.
| Role | Description |
|---|---|
| Project Viewer | Read-only access to the project |
| Project Editor | Can create and edit project resources |
| Project Admin | Full access to the project |
Whoever creates a project automatically becomes its Project Admin.
Permissions
The table shows the default permissions for each role. A member's permissions combine their workspace role with their project role on that project.
| Capability | Workspace Admin | Workspace Member | Project Admin | Project Editor | Project Viewer |
|---|---|---|---|---|---|
| View projects, agents and scans | ✓ | ✓ | ✓ | ✓ | |
| Create projects | ✓ | ✓ | ✓ | ✓ | |
| Edit and duplicate projects; create and edit agents | ✓ | ✓ | ✓ | ||
| Attach or remove policies on agents | ✓ | ✓ | ✓ | ||
| Run, cancel, rename and import scans; manage scan templates | ✓ | ✓ | ✓ | ||
| Delete projects, agents and scans | ✓ | ✓ | |||
| View and edit ground truth | ✓ | ✓ | |||
| View sensitive scan results | ✓ | ✓ | |||
| Manage policies | ✓ | ✓ | |||
| View and triage activity | ✓ | ✓ | |||
| Manage scenarios | ✓ | ✓ | |||
| Manage your own API keys | ✓ | ✓ | |||
| View usage and billing | ✓ | ✓ | |||
| Manage all members' API keys | ✓ | ||||
| Invite, remove and change the roles of members | ✓ | ||||
| Manage project access and custom roles | ✓ |
Project roles only grant project capabilities on the projects they're assigned for.
Admins can change these defaults or add roles of their own. See Custom roles.
Invite a member
Workspaces that provision users with SCIM don't have the Invite New Member card. Add those users from your identity provider.
On the Workspace settings page, go to the Invite New Member card.
Enter the person's Name and Email.
Choose a Role: Member or Admin. You only see Admin if you're allowed to change member roles.
Optional. If you're inviting a Member, use Project access to pick a project role for each project. Leave a project on No access to keep it hidden from them. Admins get access to every project, so this list doesn't appear for Admin invites.
Select Invite.
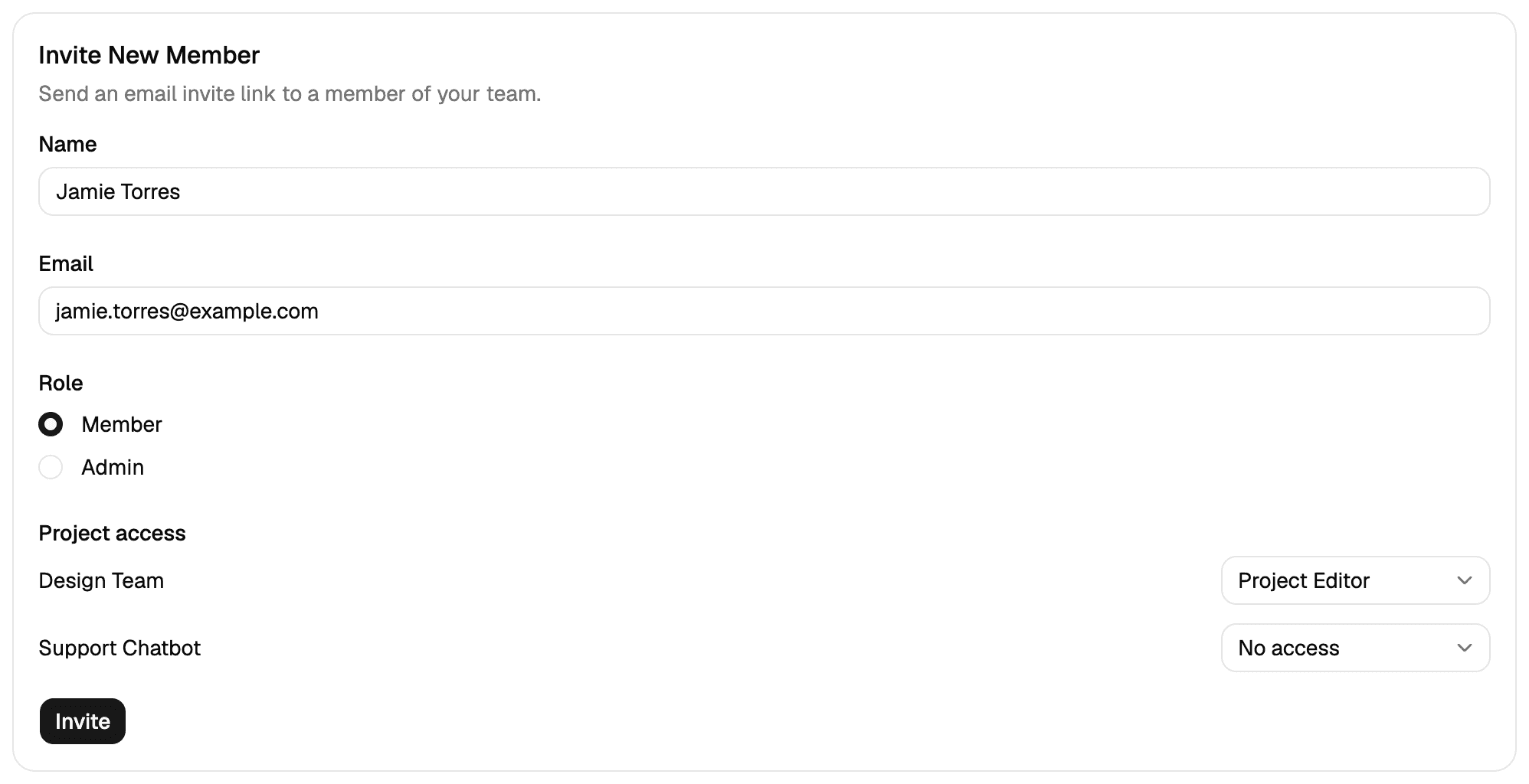
The person gets an email with a sign-in link. Any project access you picked is applied when they accept the invite. If they belong to the workspace already, you see the error "This person is already a member of your organization."
Manage pending invites
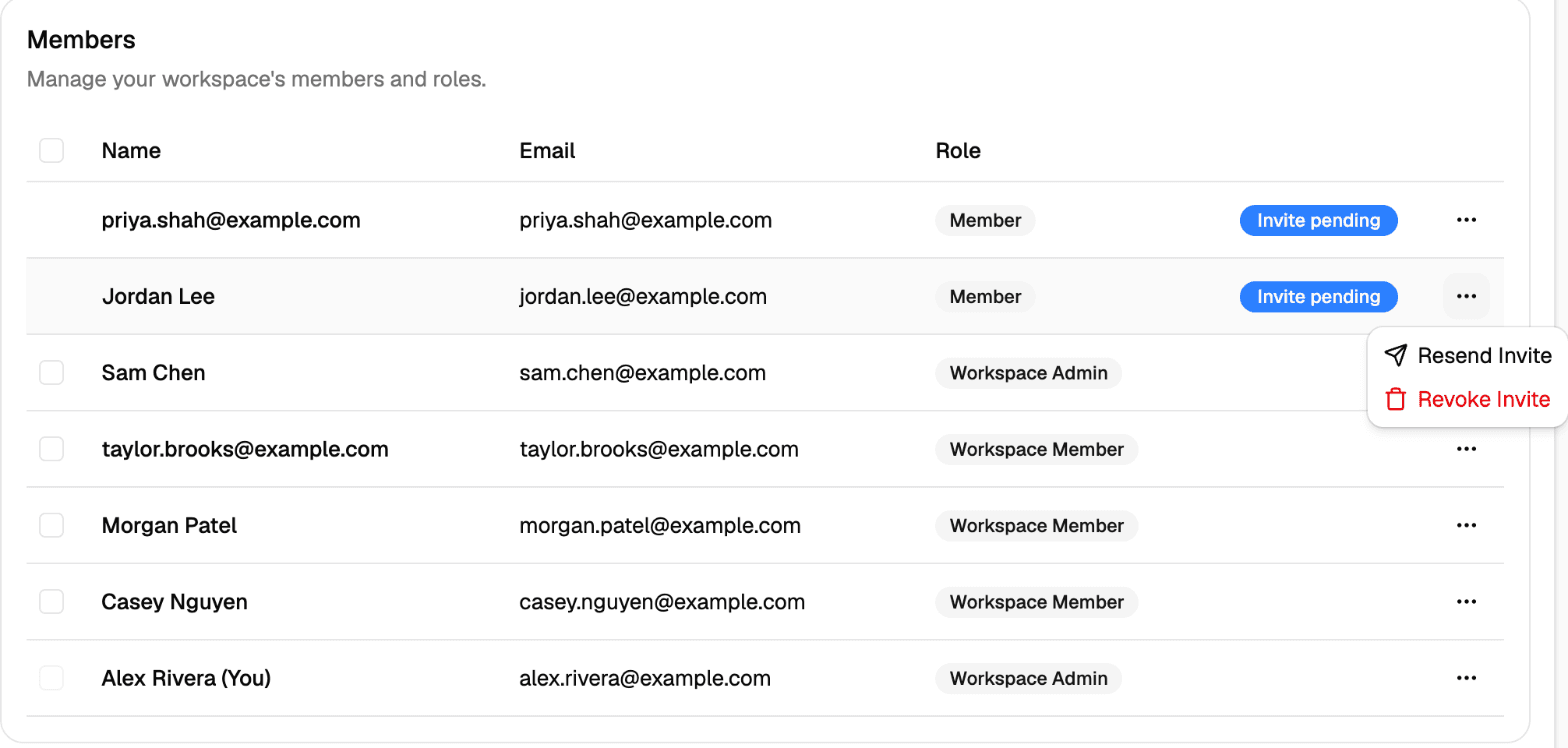
Invitations that haven't been accepted yet appear in the Members table with an Invite pending badge. To act on one, open the actions menu (⋯) on its row:
- Resend Invite sends the email again. The role and project access from the original invite are kept.
- Revoke Invite cancels the invitation, and the link in the email stops working. Confirm with Revoke invite.
Change a member's role
In the Members table, open the actions menu (⋯) on the member's row.
Select the new workspace role, such as Workspace Admin or Workspace Member. Custom workspace roles appear here as well. The member's current role is checked.
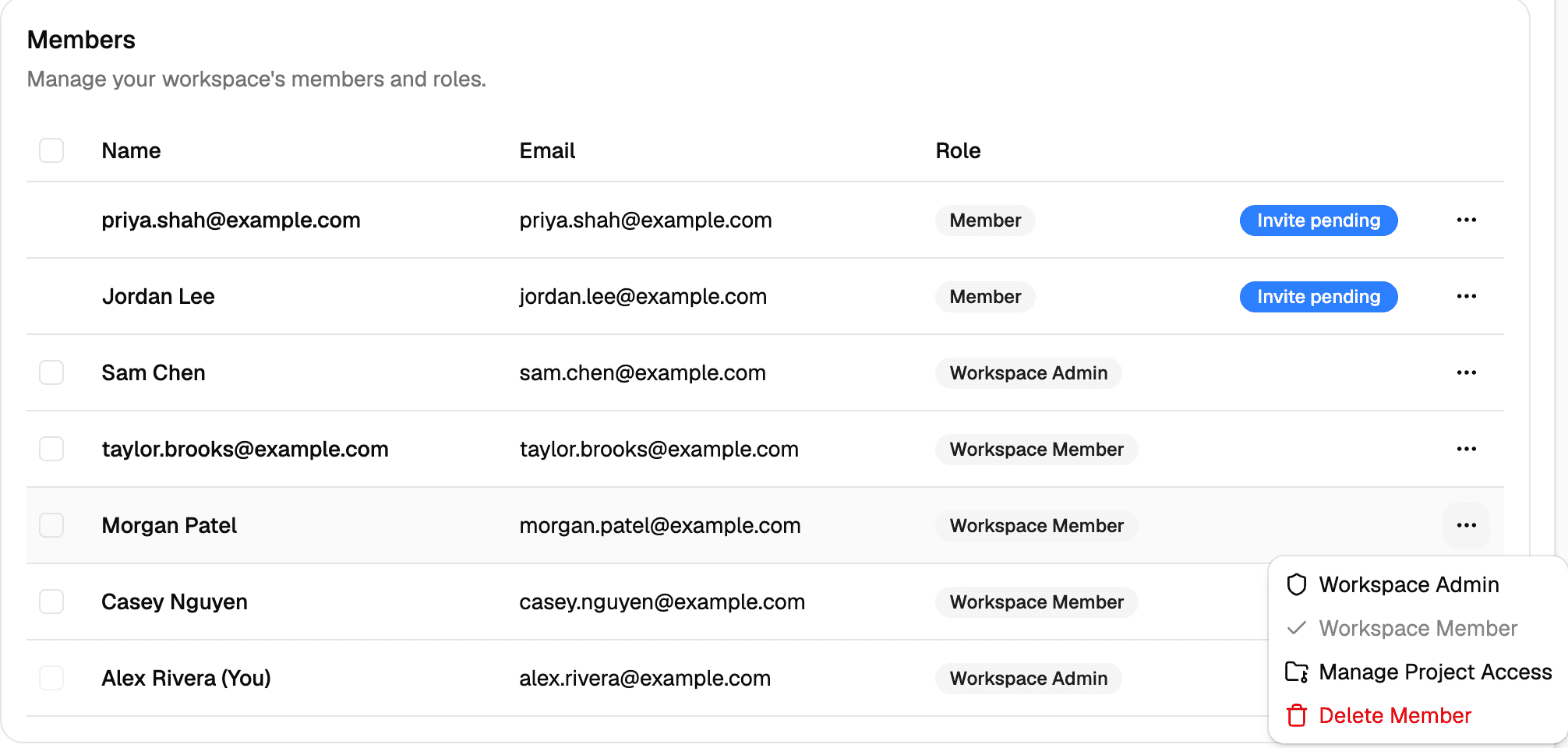
You can't change your own role. To change it, ask another admin.
Manage project access
Project access controls which projects a Workspace Member can see, and what they can do in each one. Workspace Admins can always access every project.
For one member
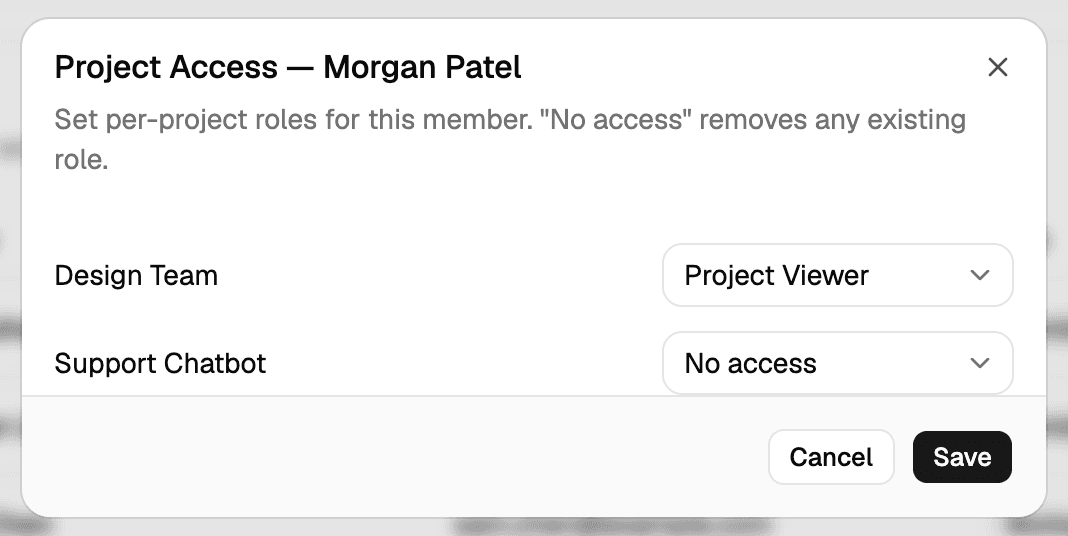
In the Members table, open the actions menu (⋯) on the member's row and select Manage Project Access.
For each project, choose Project Viewer, Project Editor, Project Admin, or No access. No access takes away any role the member had on that project.
Select Save. If you've set every project to No access, confirm with Remove access.
For several members at once
In the Members table, check the box next to each member you want to update. You can select up to 200 at a time, or use Select all loaded.
Select Manage Project Access in the bar that appears above the table.
For each project, choose a role to grant, or leave it on Leave unchanged.
Select Save.
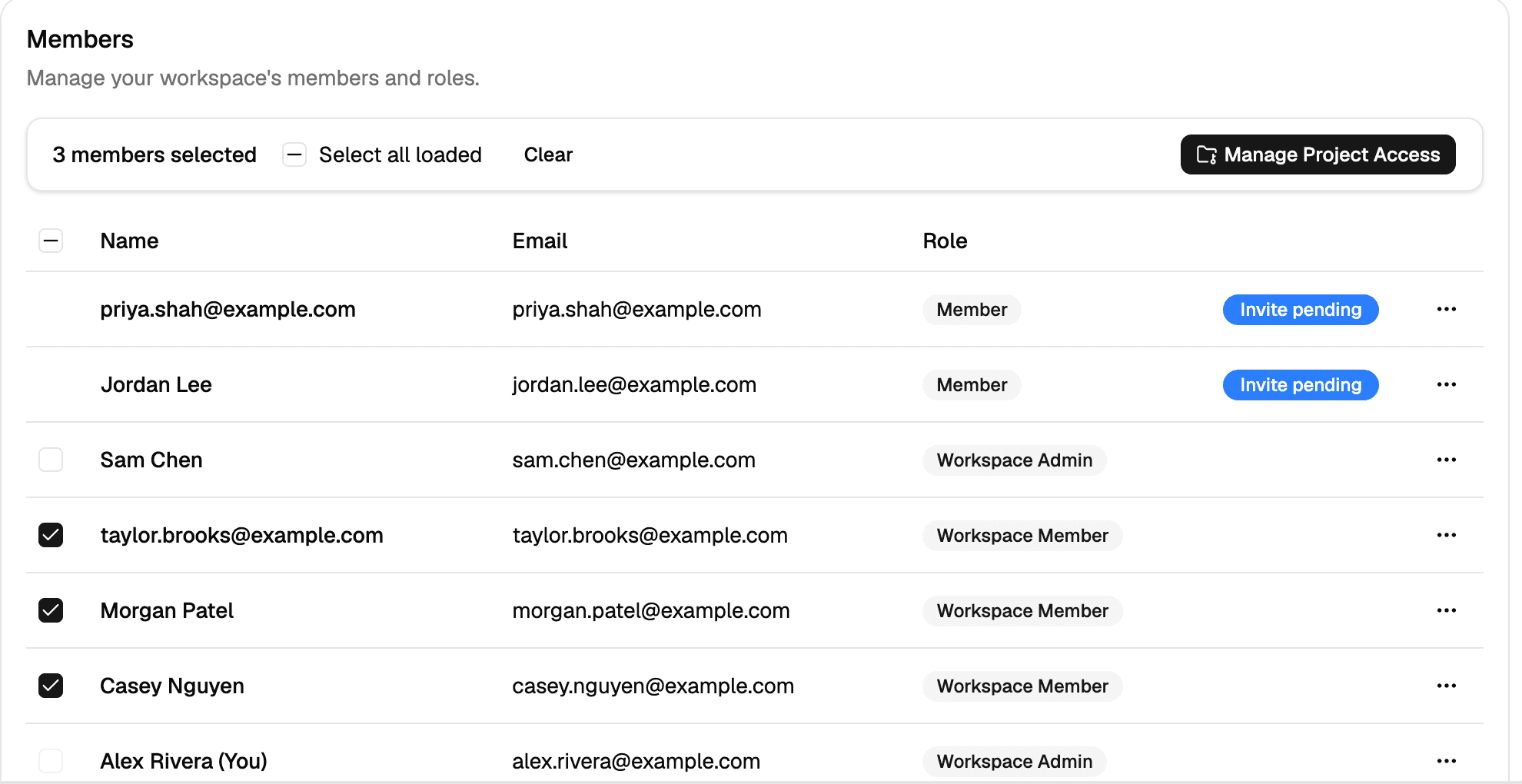
Bulk updates only add access. Projects left on Leave unchanged keep their current access. Your own account and any deprovisioned members are skipped, and the result message tells you how many were skipped.
Remove a member
In the Members table, open the actions menu (⋯) on the member's row and select Delete Member.
Confirm with Delete.
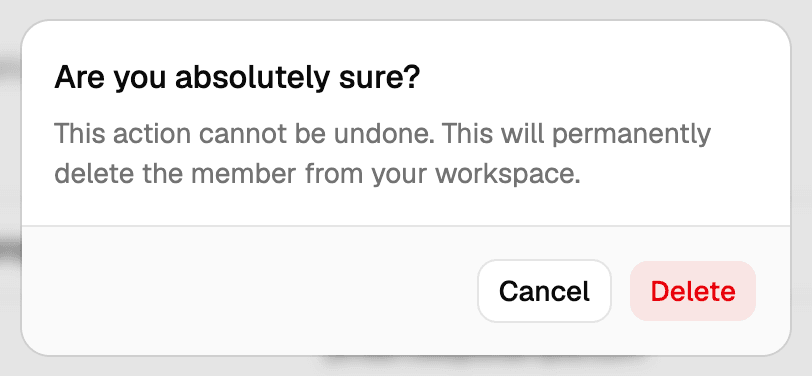
Deleting a member is permanent. It removes the member and every role and project access they had. To bring them back, invite them again.
- Leaving a workspace. Admins can remove themselves with Leave Workspace on their own row. They lose access and are signed out right away. Members can't leave a workspace themselves, so an admin has to remove them.
- The last admin. A workspace must always have at least one admin. If you're the only one, make another member an admin before you remove yourself.
- Members managed by your identity provider. Members marked Awaiting login or Deprovisioned come from SCIM, so you manage them in your identity provider.
Custom roles
Admins can change what the built-in roles allow, or add roles of their own. Go to Settings and select Manage on the Roles card.
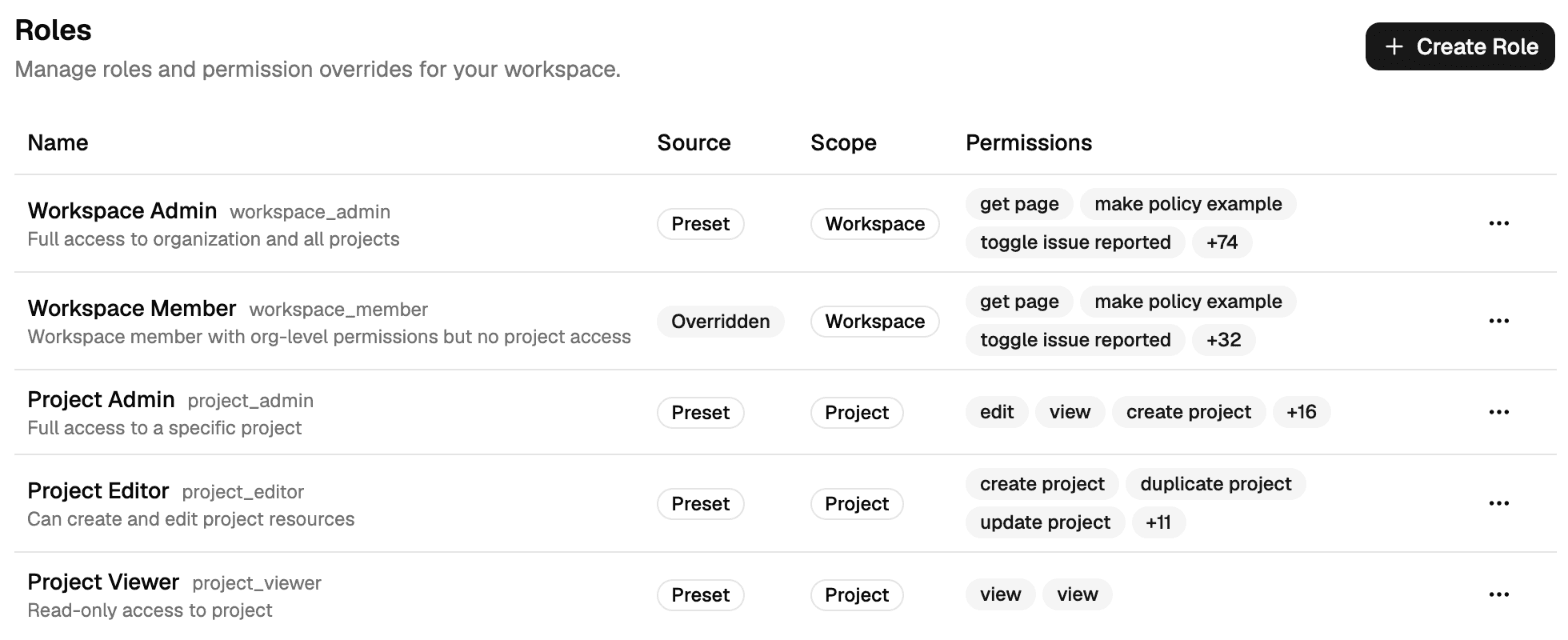
- Create Role adds a custom role with an Identifier, Display Name, Description and Scope. The scope is either Workspace or Project and can't be changed later. Project-scoped roles can only hold project permissions.
- Edit Permissions changes a role's permissions. When you edit a built-in role this way, your workspace gets its own override of it, and the role shows an Overridden badge.
- Revert to Defaults removes the override from a built-in role.
- Delete Role permanently deletes a custom role and takes it away from everyone who has it.