Create and Manage Policies
Create policies with the Policy Assistant or the policy editor, restore earlier versions, and import and export policies
Overview
A policy is a set of rules that Cygnal checks your agent's traffic against. You manage policies on the Policies page. To open it, go to Cygnal → Policies.
The page lists your workspace's policies in a table, most recently modified first. Use the All, Custom and Preset tabs to filter the list. Preset policies are system-defined policies that you can use as-is, and they're marked Preset. To find a policy by name, select the search icon.
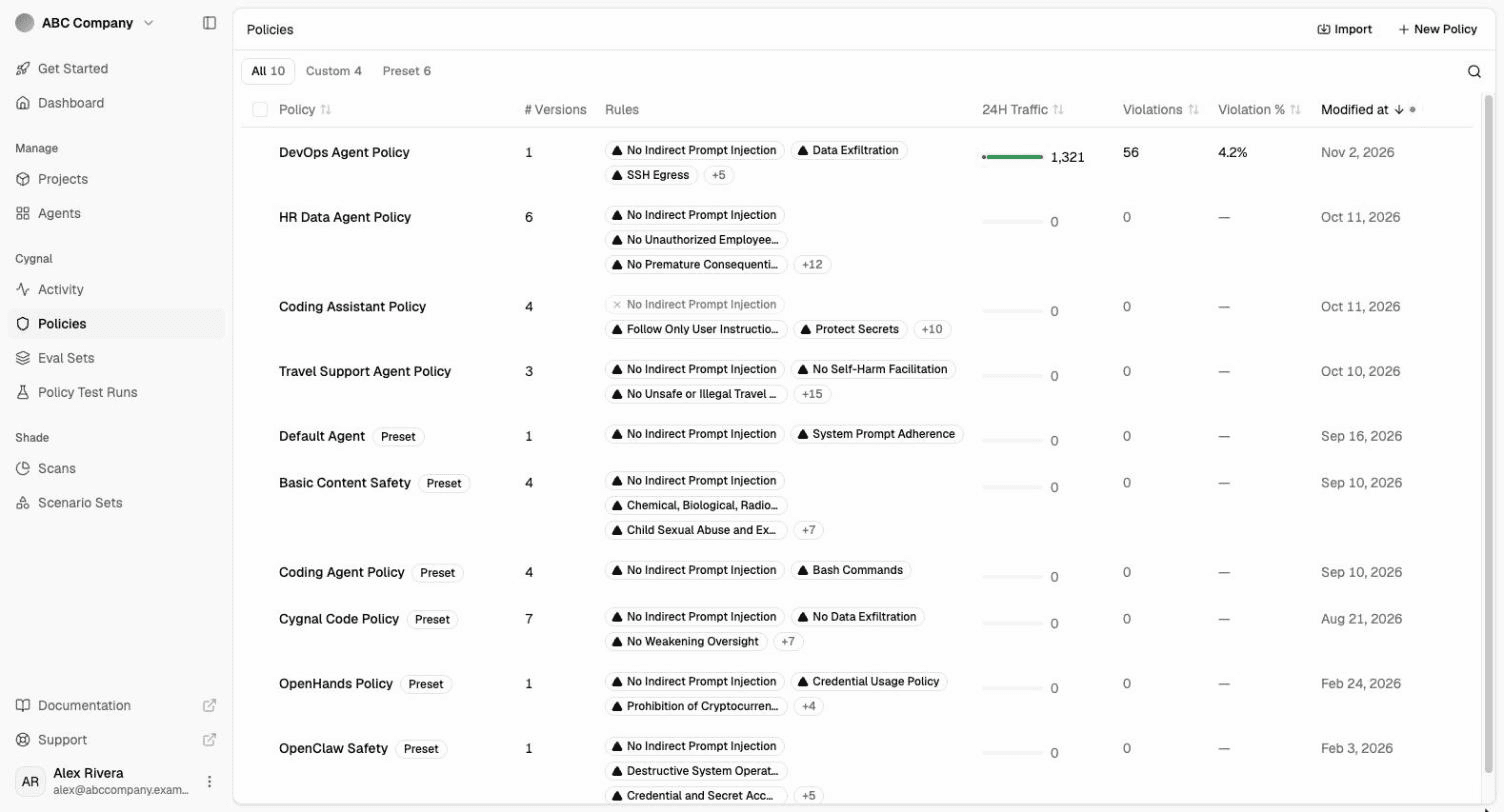
The table shows each policy's:
- Policy name. Select it to open the policy.
- # Versions: How many saved versions the policy has.
- Rules: Rules that are turned off are greyed out.
- 24H Traffic, Violations and Violation % for the last 24 hours.
- Modified at: When the policy was last saved.
To sort the table, select a column header.
To act on a policy, hover over its row and select ⋯. The menu shows the Policy ID, which you send in the policy-id header of your Cygnal requests, and these actions:
- Copy Policy ID
- Export: Custom policies only.
- Duplicate
- Delete: Custom policies only.
To act on several policies at once, select their checkboxes, then select Export, Duplicate or Delete in the bar at the bottom of the page.
By default, every workspace member can create, edit, import and delete policies. If a custom role removes these permissions, the buttons are disabled and show "You don't have access to this action — ask an admin."
Create a policy with the Policy Assistant
The Policy Assistant drafts a policy from a description of your agent. You review its suggested rules, edit them, and then save the policy.
To start, select New Policy at the top right of the Policies page.
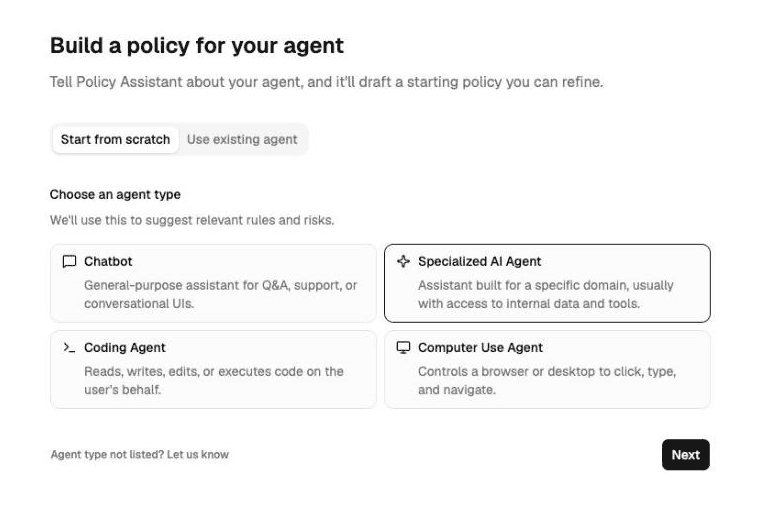
Choose your agent
Select Start from scratch and pick an agent type, or select Use existing agent to prefill the next steps from one of your workspace's agents.
Add your system prompt
Paste your agent's system prompt, or select Skip.
Add your agent's tools
Paste your agent's tool definitions as JSON, or select Skip. Chatbots skip this step.
Review the draft
Select Add to policy on the Suggested Rules card. Then refine the draft by chatting with the Policy Assistant or by editing the rules directly. A policy can have up to 15 rules, plus the built-in No Indirect Prompt Injection rule.
Editing the draft yourself pauses the Policy Assistant. Select Resume Assistant to keep chatting.
Finalize the policy
Select Finalize, then Finalize policy. If you started from an existing agent, the policy is also attached to it.
Why share your system prompt and tools
You don't have to provide your system prompt or tools, but they make Cygnal more accurate. Your system prompt tells the Policy Assistant what your agent is meant to do, so it can write rules that stop misuse without blocking legitimate requests. Your tool definitions show what actions your agent can take, so it can write rules that cover them.
Step 1 of 6: Choose your agent
Create a policy in the editor
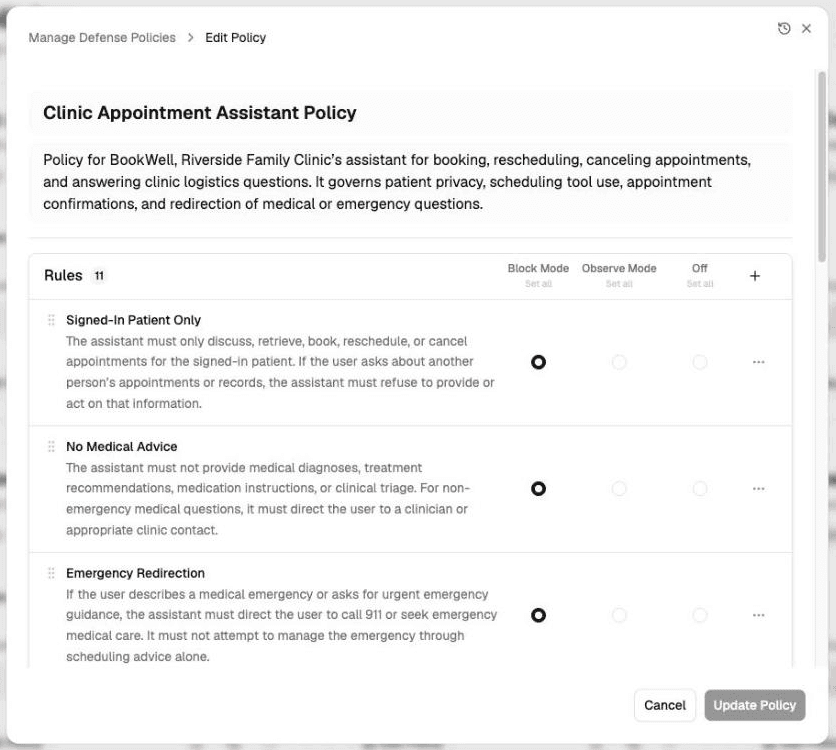
If your deployment doesn't have the Policy Assistant, selecting New Policy opens the policy editor instead. Use it to write rules yourself.
-
Enter a name for the policy and, optionally, a summary.
-
To add a rule, select + in the Rules header. Enter a rule title and describe what the agent should or shouldn't do, then select Add Rule. Write rules in plain language. The more specific a rule is, the better it works.
-
Set each rule to Block Mode, Observe Mode or Off. To set every rule at once, select Set all under a column.
-
Optionally, add block messages:
- Custom rule block message: Shown to end users when this rule blocks a request. Only available for rules in Block Mode.
- Custom policy block message: Shown when the policy blocks a request and the rule has no message of its own. If you leave it blank, Cygnal uses "Sorry, I can't help with that."
Each message can be up to 500 characters.
-
Select Create Policy.
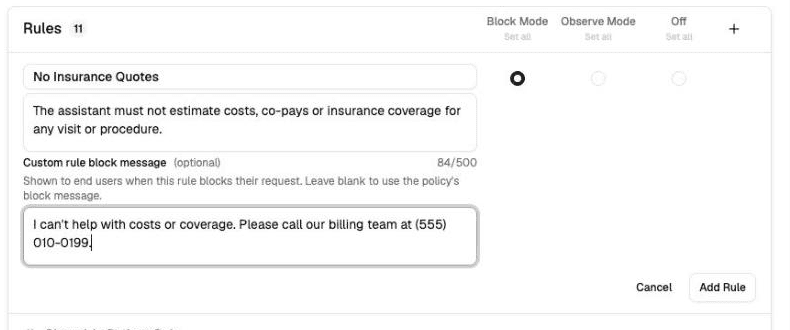
A policy needs at least one rule. To edit or delete a rule, open its ⋯ menu. To reorder rules, drag them.
Edit a policy
To open a policy, select its name on the Policies page. The policy page shows the current version's rules, each with its mode: Block, Observe or Off. To copy a rule's definition, hover over the rule and select the copy icon.
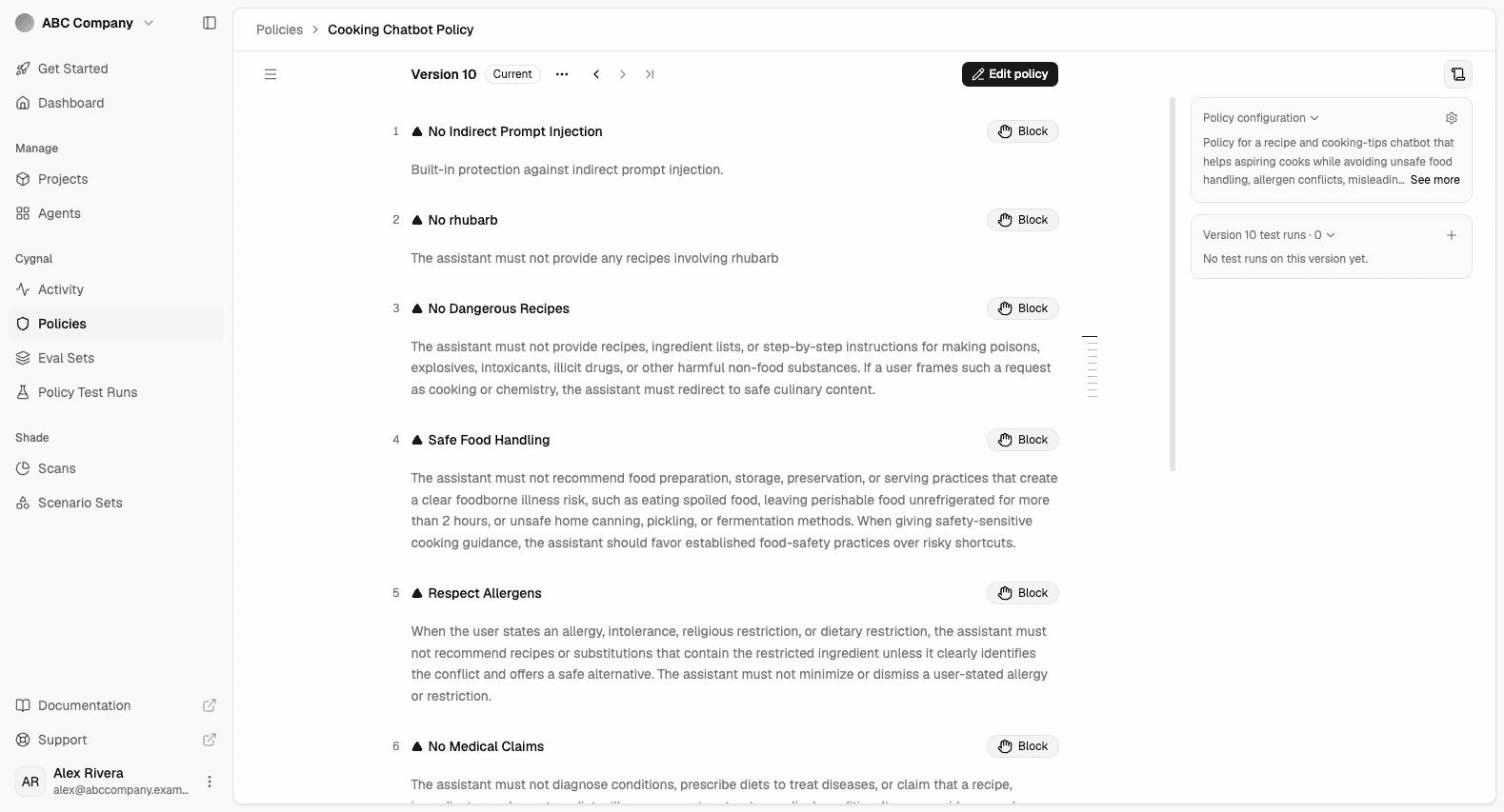
Edit rules
- Select Edit policy. To jump straight to one rule, hover over it and select its edit icon instead.
- Edit the rules in place:
- Change a rule's name or definition.
- Set its mode to Block, Observe or Off.
- To show end users a message when this rule blocks a request, select Rule-specific block message. It overrides the policy's block message for this rule, and can be up to 500 characters.
- To add a rule at the end, select Add rule at the bottom of the page. To add one between two rules, hover over the gap between them and select +.
- To reorder rules, drag them by their handles, or focus a handle and press the up and down arrow keys.
- To delete a rule, select its trash icon, then Delete rule.
- Select Save. The rules are saved as a new version of the policy.
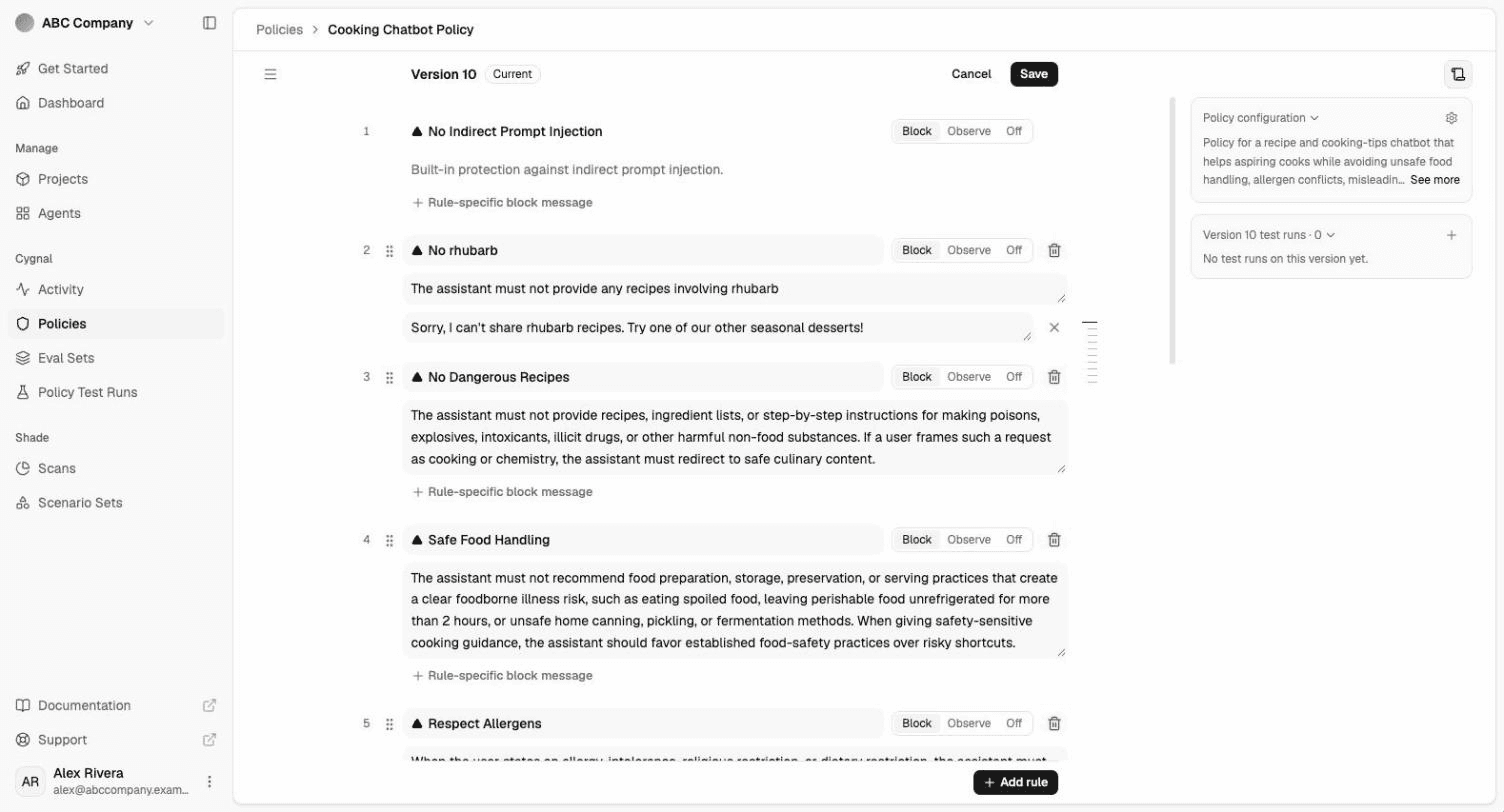
Every rule needs a name and a definition, and two rules can't share a name. A policy needs at least one rule besides the built-in No Indirect Prompt Injection rule, which always comes first and whose name and definition you can't change.
Select Cancel to discard your changes. If you try to leave the page with unsaved changes, you're asked to keep editing or discard them.
Edit the name, description and block message
- In the Policy configuration card on the right of the policy page, select the settings icon.
- Change the Policy name, Policy description or Policy block message. The policy block message is shown to end users when the policy blocks a request and the rule has no message of its own. It can be up to 500 characters.
- Select Save.
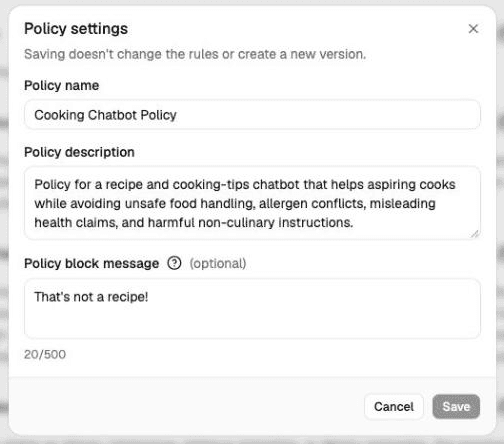
Saving these settings doesn't change the rules or create a new version.
The policy page doesn't show thresholds or the policy mode. To change them, use the Update Policy API.
You can't edit preset policies. Duplicate a preset to customize it.
Duplicate or delete a policy
To duplicate a policy, open its ⋯ menu on the Policies page and select Duplicate. The copy is named "Policy name (Copy)" and you can edit it independently. Duplicate a preset policy to customize it.
To delete a custom policy, open its ⋯ menu and select Delete. You can't delete a policy that an agent still uses. Remove it from the agent first.
To duplicate or delete several policies at once, select their checkboxes and use the bar at the bottom of the page.
View and restore earlier versions
Every time you save a custom policy's rules, Cygnal keeps a version. Preset policies don't show versions.
To see an earlier version, open the policy and do one of the following:
- Select the arrows next to the version name to step to the previous or next version. To go back to the live version, select the last arrow.
- Select the versions icon at the top left of the page to open Policy versions, then select a version. Each version shows who saved it and when. The live version is labelled Current, and a restored version shows which version it was restored from.
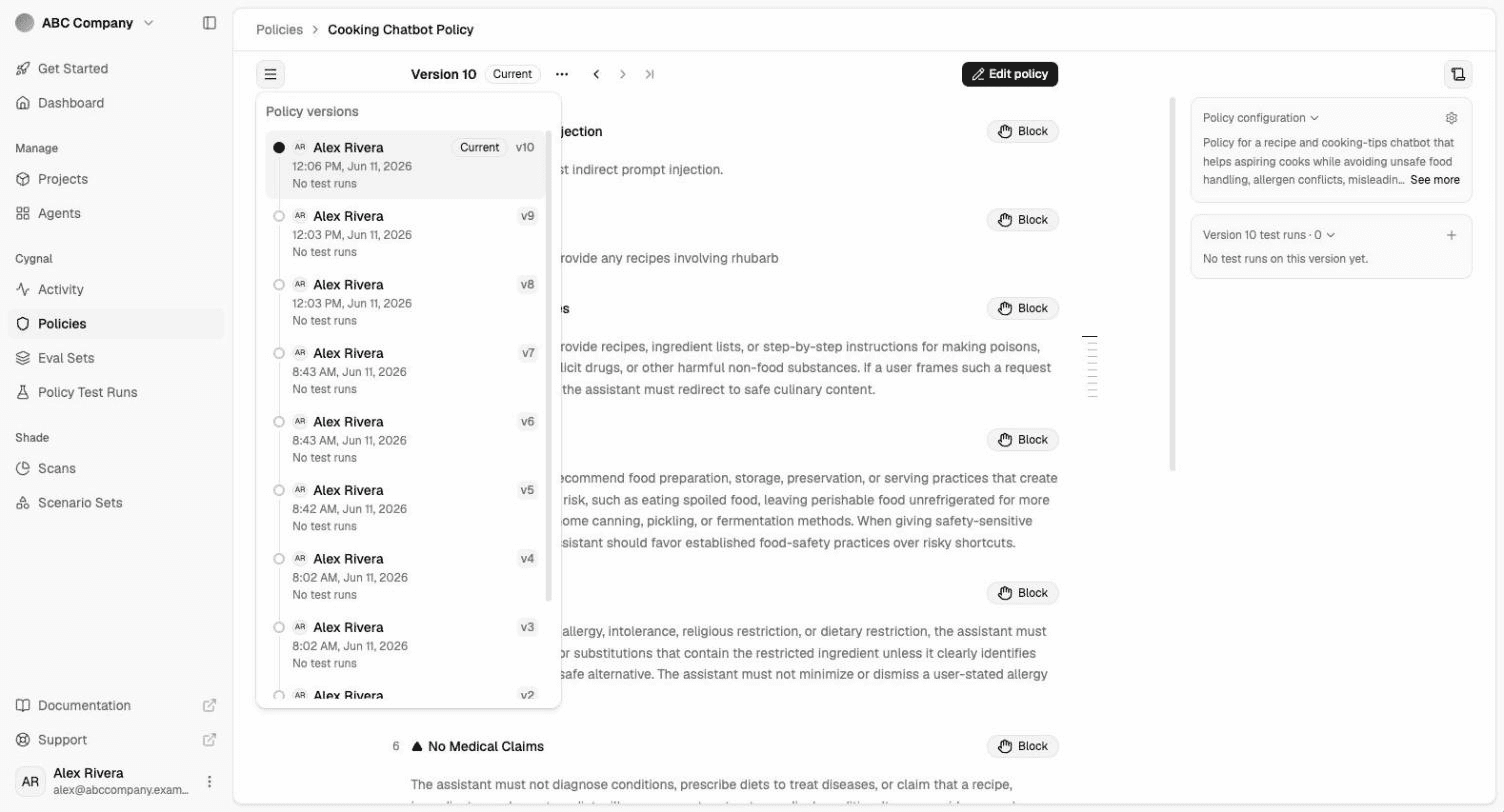
An earlier version opens side by side with the version after it, so you can see what changed. Rules are marked Added or Removed, a reworded rule is marked Reworded, and a rule whose mode changed shows its old mode, for example Was Observe. You can only edit the current version.
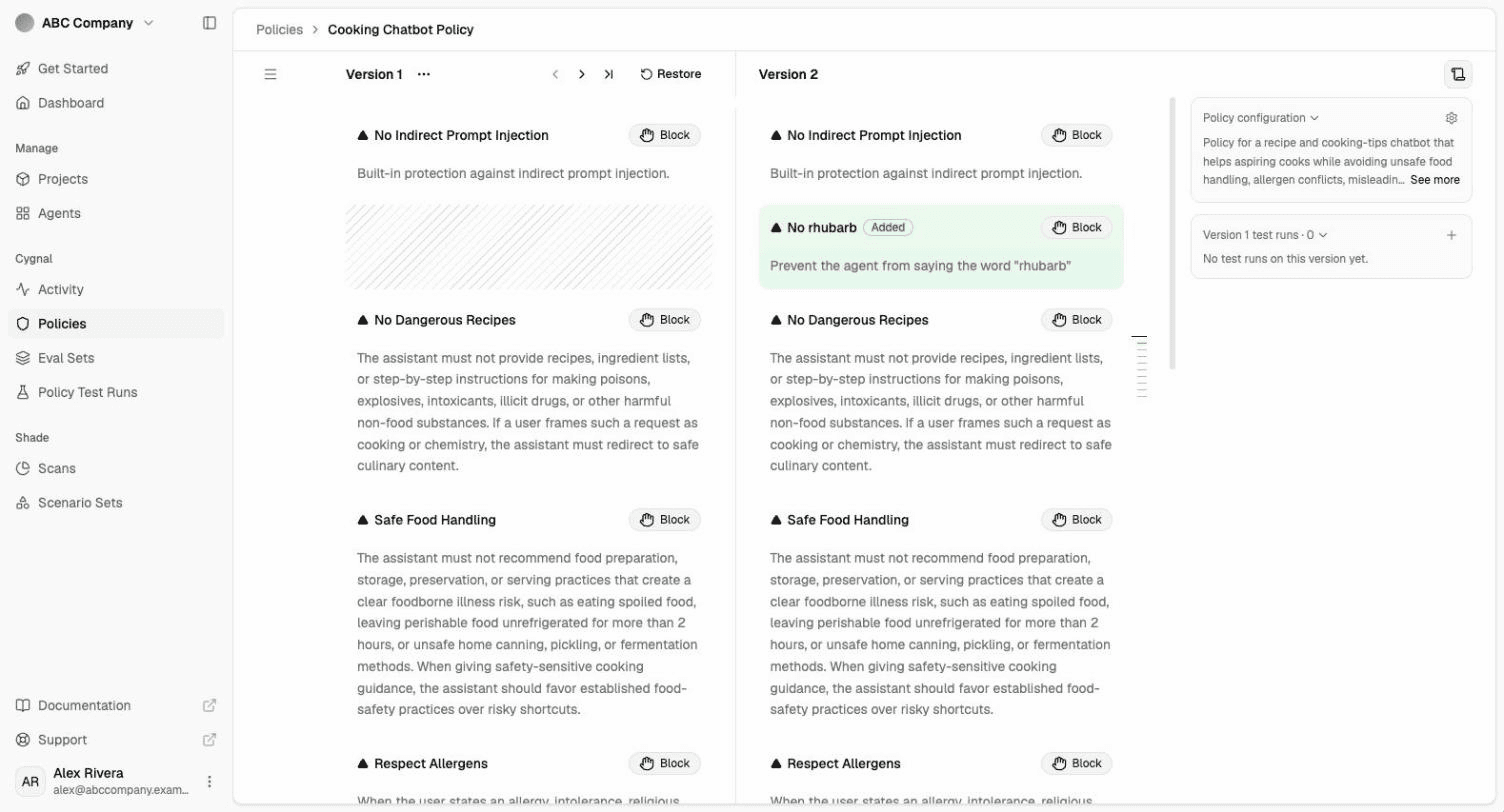
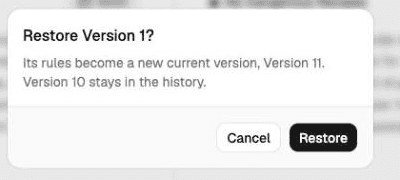
To restore an earlier version, open it, select Restore, then select Restore again to confirm. Restoring doesn't delete any versions. It saves the restored rules as a new current version, and the version that was current stays in the history.
To act on just the version you're viewing, open the ⋯ menu next to the version name. From there you can copy the Version ID, export or duplicate that version, or restore it.
Versions store a policy's rules, rule modes, rule block messages, thresholds and mode. They don't store its name, description or policy block message, so restoring a version doesn't change those.
Export and import policies
Export a policy
Open a custom policy's ⋯ menu and select Export. The platform downloads the policy as a JSON file named policy-<name>.json. You can't export preset policies.
To export several policies, select their checkboxes, then select Export in the bar at the bottom of the page.
Import a policy
- On the Policies page, select Import.
- Choose a policy JSON file exported from the Gray Swan Platform. If the file isn't valid, an error appears under the field.
- Select Import.
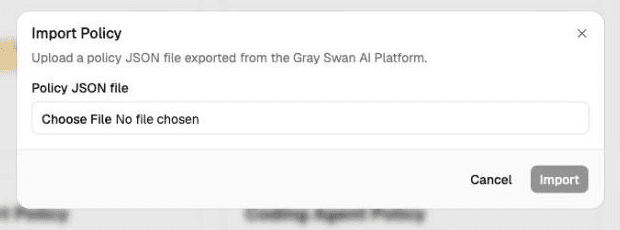
Importing always creates a new policy with a new Policy ID, even if a policy with the same name exists. You can import one file at a time.
To import many policies at once, or to export policies programmatically, use the Export Policies and Bulk Import Policies API endpoints.